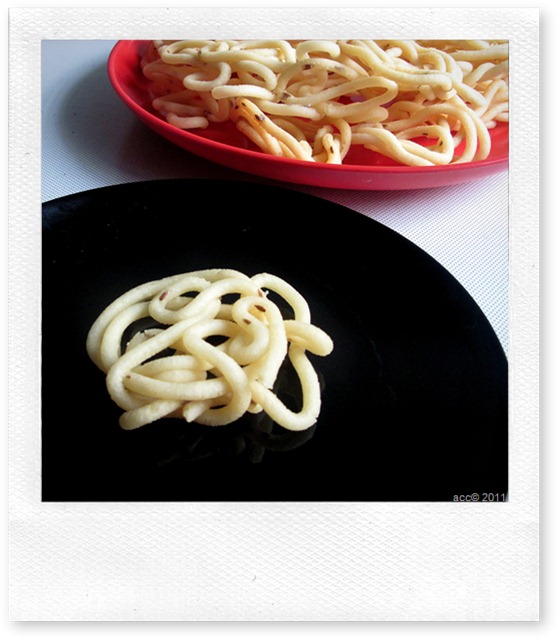
Mostly we all make thenkuzhal for diwali or some special occasions. I love this murukku since my childhood days.I used to do all the pre preparatory works like buying rice and dal , grinding it in flour mill etc..I sit with my mom & paati when they make this for diwali especially for the last batch of murukku .. She makes half cooked murukku( we call it "arai vekkaadu" in tamil) . I love this murukku more than the crispy ones. I eat it hot immediately after taking out from the oil.Even today , my MIL made this specially for me..How sweet !! .I saw so many thenkuzhal recipes in web with different proportions of rice and urad dal . I want to share my version.I tried to take step by step pics for beginners. I really admire our fellow bloggers who blog recipes with step by step pics for each and every post. They have so much of patience and skill to do this. I really don't have both
  .For sweets and savouries step by step presentation is most essential i feel. Hope this post helps beginners. Feel free to leave ur comments about my presentation.I will improve in my further posts. Now coming to my version..
INGREDIENTS
- Raw rice / Maavu arisi – 1 kg or 5 cups
- Round white urad dal – 3/4 cup
- Fried gram dal / pottukadalai – 1 handful
- Butter – 4 tbsp or 100 gms
- Asafetida / hing – 1/2 tsp
- Jeera / cumin seeds or Black sesame seeds – 2 tbsp
- Salt & water – As needed.
- Cooking oil – for deep frying..
|
"""PLEASE HAVE A LOOK AT THE "POINTS TO REMEMBER" BEFORE STARTING.."""
METHOD
- Heat a kadai and dry roast urad dal slightly without changing its colour. Roast till nice aroma comes from urad dal. Switch off the flame and add the fried gram dal.
- Now mix the rice, roasted urad dal and fried gram dal.
- Grind in flour mill or powder it in mixie. If u use mixie to grind the mixture, please don't forget to sieve the flour. Flour should be very fine in texture.
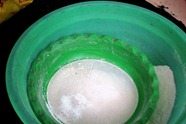
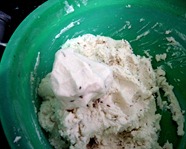
- Add salt , melted butter, hing , jeera or sesame seeds and water to make a non sticky dough.
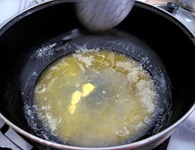 
Take the murukku press and mould with one whole. 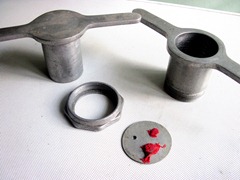 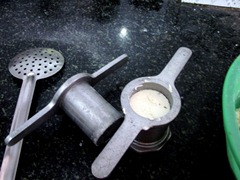
Fill the dough and set aside.Heat the oil in a broad kadai and and press the murukku in circular motion directly in oil or press the murukku in a polythene sheet or in the back of ladle separately and then drop in hot oil. This way u get a nice shape. After u press the murukku , please stand a few feet away from the kadai.Sometimes , very rarely murukku may burst like seedai . If it doesn't burst, then proceed. 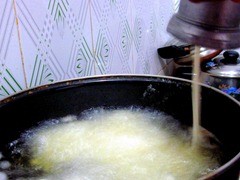
Cook for sometime.Flip and cook for some more time till the hiss sound and bubbles ceases . Do it in medium flame.Adjust the flame whenever needed. 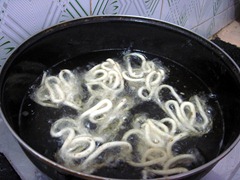 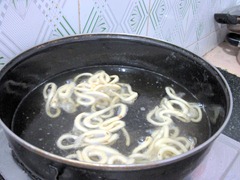
Remove and drain in a paper towel..Store in an air tight container after it cools down. 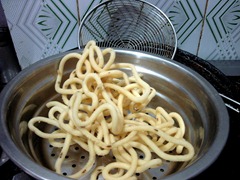
Don't forget to try the half cooked murukku in the last batch. For this after u drop the murukku in oil , just flip immediately and remove in 10 secs.. Eat it hot !! White colored , crispy thenkuzhal is ready to enjoy !! |

Points to remember
- When u make murukku in large quantities , make the dough in batches to avoid the dough from drying.Also cover the dough with a damp cloth or a lid while cooking murukku. This helps in getting white colored murukku for all the batches. Otherwise color may vary for the last batches.
- We have added fried gram dal and butter to get the crispness & white color . But usually fried gram dal is not added in thenkuzhal.Its purely optional.
- Adding too much of butter makes the murukku look oily and becomes soggy very soon.Shelf life gets reduced.
- Adding more urad dal flour or too much of roasting the urad dal results in dark colored murukku.So make sure u roast the urad dal without changing the color..
- If u use store bought rice flour and urad dal flour , the ratio would be 6:1.No need to roast the urad dal flour if it is ready made.
- The murukku flour should be very fine in texture otherwise it may burst while cooking. So i always sieve the flour for safer side
- Use enough oil for deep frying. Add more oil after few batches if necessary.
- Drop or press the murukku only when the oil becomes hot. U can find this by dropping a pinch of flour. It raises up quickly.This is the correct heating point. Do not let the oil fume. Always keep the flame in medium for even cooking.
- Instead of pressing in oil directly , u can try pressing it in the back of ladle greased with oil or greased polythene sheets. This way u'll get nice shape..
- After cooking when u break the murukku , u can c a hole in the middle of the murukku like funnel. This denotes the murukku is perfect !!
|

Can u see the hole . Catch u in my next post. Bye. Have a gr8 weekend 


 karisalankanni is also a specific remedy for jaundice. It has a great medicinal value in the treatment of hair. Karisalankanni is said to protect against night blindness and other eye diseases probably because of its high carotene content.


 .I saw so many thenkuzhal recipes in web with different proportions of rice and urad dal . I want to share my version.I tried to take step by step pics for beginners. I really admire our fellow bloggers who blog recipes with step by step pics for each and every post. They have so much of patience and skill to do this. I really don't have both
  .For sweets and savouries step by step presentation is most essential i feel. Hope this post helps beginners. Feel free to leave ur comments about my presentation.I will improve in my further posts. Now coming to my version..


