miércoles, 29 de febrero de 2012

KARISALANKANNI KEERAI CHAPATHI

Nowadays i am using karisilankanni keerai in my cooking twice a week for health reasons. I make kootu and this chapathi.But i would say,we love this chapathi more than kootu ;) It is very easy to prepare.I make this for my hubby's lunch box. It stays soft and onion raita is the best accompaniment. I use the same method to prepare palak and other keerai chapathis.

                                                             keerai chapath


INGREDIENTS

  • Karisalankanni leaves- 1 bunch
  • Wheat flour - 1 cup
  • Besan flour  - 1 tbsp
  • Sambhar powder - 1 tsp
  • Garam masala - 1/2 tsp
  • Curd - 1/5 cup ( adjust)
  • Olive oil - 1 tsp
  • Salt -as needed
  • water - As needed

         METHOD

  • Wash the leaves .Heat the kadai with a tsp of oil  and saute the leaves till it reduces to half in quantity.
  • Grind to make a smooth paste by adding little curd . Now in a bowl , take the wheat flour,besan flour , sambhar & garam masala powder,salt and water.Knead well to make a soft , pliable dough.
  • Roll to make thin chapathi and toast on a dosa tawa.
  • Serve hot with onion raita and pickle.

keerai chapath 1      

KITCHEN CLINIC

Karisalankanni (Eclipta prostrata) is the herb of choice in treating liver diseases. This herb grows in marshy areas throughout the year. It grows abundantly during the rainy season. There are two varieties of karisilankanni, one has yellow flowers and the other white. The yellow one is more potent.

Karisalankanni is most effective when eaten raw. It can also be dried in shade and powdered.


Medicinal properties

karisalankanni is also a specific remedy for jaundice. It has a great medicinal value in the treatment of hair. Karisalankanni is said to protect against night blindness and other eye diseases probably because of its high carotene content.
Uses

1. It is good for teeth, skin and hair.
2. It induces appetite.
3. It aids digestion and helps expel fecal matter from the large intestines.
4. It heals ulcers.
5. It cleans the liver and encourages secretion of bile.
6. It cures inflamed liver also called fatty liver.
7. It expels intestinal worms, cures coughs and asthma, and tones the body.
8. The yellow variety is said to be particularly good for the skin and eyes.


When ground to a paste and cooked as in karislankanni kootu, it is good for teeth, skin and hair. It induces appetite. It aids digestion and helps expel fecal matter from the large intestines. It heals ulcers. It cleans the liver and encourages secretion of bile. It cures inflamed liver also called fatty liver.
Adulterated food can jeopardise the liver. Also foods contaminated with chemicals can play havoc. All these on entering human body should to be expelled and the liver is strained beyond its limit. This results in sluggish liver, stomach upset and gastroenteritis. Even though we consume nutritive foods in plenty than the previous generations it doesn't seem to strengthen our immune system. This is because of the loss of coordination between the liver, intestines and stomach. Adulterated food, contaminated water and polluted environment are the factors that are to be blamed for this state of affairs. There is a high risk of hypercholesterolemia, high blood pressure, cirrhosis, atherosclerosis and coronary thrombosis.


Karisalankanni comes to rescue in such cases. One ounce of karisalankanni juice (15 ml) and cow's milk 20 ml (boiled and then brought down to the room temperature) are mixed and should be taken first thing in the morning. This regulates the blood pressure as well.


As karisalankanni starts working in the system, it sets right the liver and cures jaundice, fatty liver, splenomegaly, hemorrhoids, indigestion etc. Regular intake strengthens the inner organs.


lunes, 27 de febrero de 2012

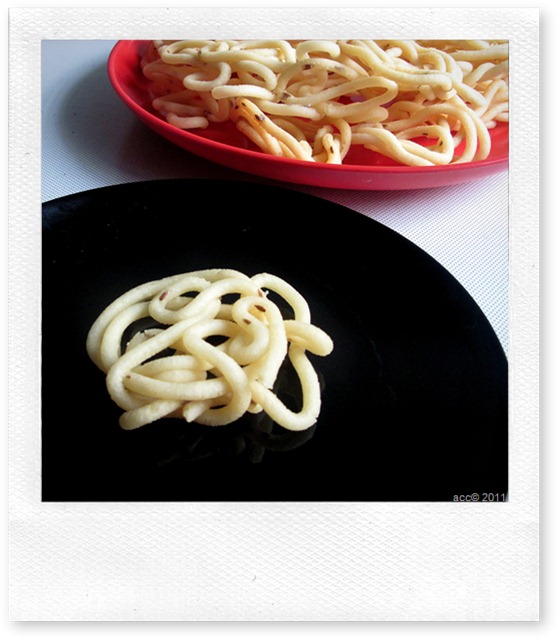
THENKUZHAL | MURUKKU - STEP BY STEP RECIPE


THENKUZHAL

Mostly we all make thenkuzhal for diwali or some special occasions. I love this murukku since my childhood days.I used to do all the pre preparatory works like buying rice and dal , grinding it in flour mill etc..I sit with my mom & paati when they make this for diwali especially for the last batch of murukku .. She makes half cooked murukku( we call it "arai vekkaadu" in tamil) . I love this murukku more than the crispy ones. I eat it hot immediately after taking out from the oil.Even today , my MIL made this specially for me..How sweet !!In love .I saw so many thenkuzhal recipes in web with different proportions of rice and urad dal . I want to share my version.I tried to take step by step pics for beginners. I really admire our fellow bloggers who blog recipes with step by step pics for each and every post. They have so much of patience and skill to do this. I really don't have both Winking smile.For sweets and savouries step by step presentation is most essential i feel. Hope this post helps beginners. Feel free to leave ur comments about my presentation.I will improve in my further posts. Now coming to my version..

INGREDIENTS

  • Raw rice / Maavu arisi – 1 kg or  5 cups
  • Round white urad dal – 3/4 cup
  • Fried gram dal / pottukadalai – 1 handful
  • Butter – 4 tbsp or 100 gms
  • Asafetida / hing – 1/2 tsp
  • Jeera / cumin seeds or Black sesame seeds – 2 tbsp
  • Salt & water – As needed.
  • Cooking oil – for deep frying..

"""PLEASE HAVE A LOOK AT THE "POINTS TO REMEMBER" BEFORE STARTING.."""

METHOD

  1. Heat a kadai and dry roast urad dal slightly without changing its colour. Roast till nice aroma comes from urad dal. Switch off the flame and add the fried gram dal.
  2. Now mix the rice, roasted urad dal and fried gram dal.
  3. Grind in flour mill or powder it in mixie. If u use mixie to grind the mixture, please don't forget to sieve the flour. Flour should be very fine in texture.

sieve

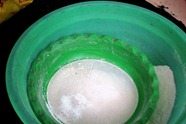
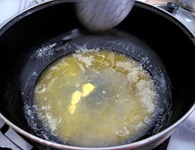
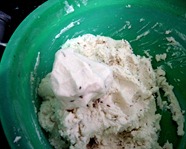
  1. Add salt , melted butter, hing , jeera or sesame seeds and water to make a non sticky dough.

melted buttermurukku dough

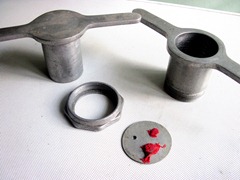
Take the murukku press and mould with one whole.

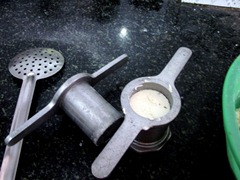
achudough in achu

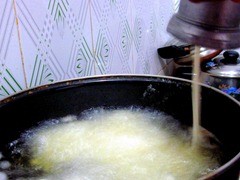
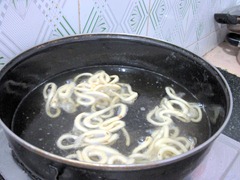
Fill the dough and set aside.Heat the oil in a broad kadai and and press the murukku in circular motion directly in oil or press the murukku in a polythene sheet or in the back of ladle separately and then drop in hot oil. This way u get a nice shape. After u press the murukku , please stand a few feet away from the kadai.Sometimes , very rarely murukku may burst like seedai . If it doesn't burst, then proceed.

pressing murukku

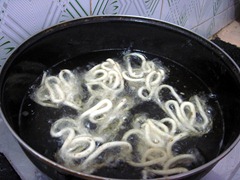
Cook for sometime.Flip and cook for some more time till the hiss sound and bubbles ceases .

Do it in medium flame.Adjust the flame whenever needed.

cookingsound ceased

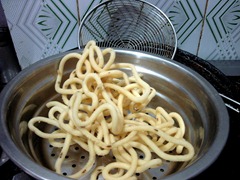
Remove and drain in a paper towel..Store in an air tight container after it cools down.

murukku in colander

Don't forget to try the half cooked murukku in the last batch.

For this after u drop the murukku in oil , just flip immediately and remove in 10 secs.. Eat it hot !!

White colored , crispy thenkuzhal is ready to enjoy !!

COLLAGE

Points to remember

  • When u make murukku in large quantities , make the dough in batches to avoid the dough from drying.Also cover the dough with a damp cloth or a lid while cooking murukku. This helps in getting white colored murukku for all the batches. Otherwise color may vary for the last batches.
  • We have added fried gram dal and butter to get the crispness & white color . But usually fried gram dal is not added in thenkuzhal.Its purely optional.
  • Adding too much of butter makes the murukku look oily and becomes soggy very soon.Shelf life gets reduced.
  • Adding more urad dal flour or too much of roasting the urad dal results in dark colored murukku.So make sure u roast the urad dal without changing the color..
  • If u use store bought rice flour and urad dal flour , the ratio would be 6:1.No need to roast the urad dal flour if it is ready made.
  • The murukku flour should be very fine in texture otherwise it may burst while cooking. So i always sieve the flour for safer side Winking smile
  • Use enough oil for deep frying. Add more oil after few batches if necessary.
  • Drop or press the murukku only when the oil becomes hot. U can find this by dropping a pinch of flour. It raises up quickly.This is the correct heating point. Do not let the oil fume. Always keep the flame in medium for even cooking.
  • Instead of pressing in oil directly , u can try pressing it in the back of ladle greased with oil or greased polythene sheets. This way u'll get nice shape.. 
  • After cooking when u break the murukku , u can c a hole in the middle of the murukku like  funnel. This denotes the murukku is perfect !!

hole in murukku

Can u see the hole  Winking smile. Catch u in my next post. Bye. Have a gr8 weekend Smile


http://feedproxy.google.com/~r/SpanishRecipesinpictures/~3/2CMD6obB8vA/

Spanish Recipes posted a photo:

Coca de Llardons

jueves, 23 de febrero de 2012

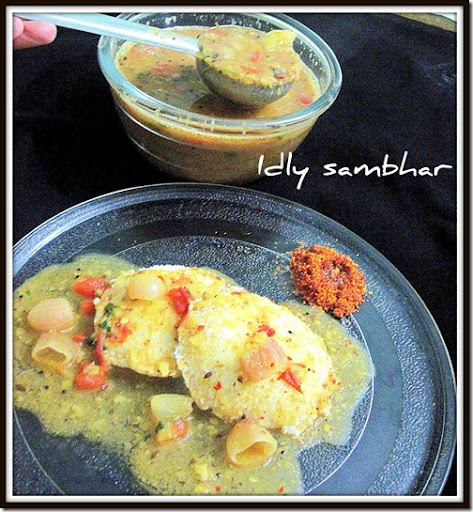
IDLY SAMBHAR - MIL'S VERSION

I've posted varieties of idly sambhar i learnt from my MOM & MIL.This one is my MIL's special sambhar.My hubby loves this a lot . So i make at least once in a week.It tastes similar to hotel sambhar.

idly sambhar toordal1

INGREDIENTS

  • Tamarind - A small gooseberry size

To pressure cook:

  • Toor dal - 1/4 cup
  • Potato - 1 no (big)
  • Turmeric powder - A pinch
  • Water - As needed.

To Roast & grind :

  • Oil - 1/2 tsp
  • Methi seeds - 1/4 tsp
  • Coriander seeds - 1tbsp
  • Channa dal - 1.5 tsp
  • Red chilly - 1 no (big)
  • Hing - 1/4 tsp

To saute:

  • Shallots / small onion - 15 nos
  • Tomato - 1 no (cut into small pieces)
  • Curry leaves - a few
  • Sambhar powder - 1/2 tsp
  • Salt & water - As needed

To temper:

  • Oil - 1 tbsp
  • Mustard seeds - 1/2 tsp
  • Jeera - 1/2 tsp
  • Urad dal - 1/2 tsp

To garnish:

  • Coriander leaves - a few
  • Ghee - 1 tbsp (for flavor)

METHOD:

  1. Soak the tamarind in warm water for 20 mins and take the extract.Set aside.
  2. Pressure cook all the ingredients given under 'to pressure cook' till one whistle.Mash the dal and set aside.
  3. Heat oil in a kadai and roast all the items given above in the same order till nice aroma arises.Powder and keep aside.
  4. In the same kadai , add oil and saute the items given under :to saute: .
  5. Saute till tomato turns mushy.Then add the sambhar powder , tamarind extract , hing & salt.
  6. Allow it to boil till the onion gets cooked.
  7. Now add the mashed dal & powdered spices.
  8. Mix well & boil for sometime.(. Be careful while adding the powder because it may form lumps.So gently stir in & sprinkle the powder simultaneously.)
  9. Finally temper all the ingredients given under 'to temper' and switch off the stove. Garnish with coriander leaves.Transfer to the serving bowl and top it with a tbsp of ghee .( i add only when there is a guest ;) )

Enjoy with soft idlies & crispy dosas by adding sesame oil!!

Variations :

** For the exact restaurant style sambhar , add a few curry leaves  while roasting the ingredients given for sambhar powder.
** Also try adding a tsp of grated coconut for additional flavor while roasting.
** Add a small piece of jaggery along with the tamarind extract. (i add very rarely)
** Add veggies like brinjal , Drumstick and carrot to make it more healthy.

In this sambhar we should add very less tamarind extract.So it will taste mild and less spicy. If u want it more spicy & tangy , add pinched red chillies while tempering and squeeze some drops of lime juice before serving.

KITCHEN CLINIC :

TOOR DAL :

Pigeon peas are nutritionally important, as they contain high levels ofprotein and the important amino acids methionine, lysine, and tryptophan. In combination with cereals, pigeon peas make a well-balanced human food.

Other common names

Other common names are तुवरि (tuvari) in Sanskrit, arhar(Hindi/Bangla:অরহর), Rohor (Assamese), Rahar (Nepali), red gram, toovar/toor (Gujarati/Marathi/Punjabi), tuvaram paruppu (Tamil: துவரம்பருப்பு),tuvara (Malayalam :'തുവര' ),togari (Kannada), Kandi(కంది)(Telugu), Yewof ater (Amharic), gandul, guandul, guandu, Congo pea, Gungo pea, Gunga pea, and no-eye pea.

USES:

It is useful in the treatment of internal organ swelling. Some herbal practitioners/researchers are of the opinion that it diminishes the swelling of internal organs like stomach, liver, intestines etc. In case of wound or cancer of these organs it is helpful in reducing them. Its recommended usage is: Green leaves of Pigeon peas around 10 grams along with 7 black peppers should be finely ground and mixed in water and then taken as a drink. Green leaves of Pigeon peas ground in water and added to half boiled water should be applied externally on the affected body part. Pigeon peas should be cooked in water (as dal, an Indian dish) and its water should be given to the patient.


martes, 21 de febrero de 2012

AVAL KESARI / POHA KESARI

I came to know about this kesari from my school friend Swarna.It was very new to me because i've tasted kesari made with rava / semiya. When she told about this i found it interesting. I made for my friday pooja . It came out well and tasted excellent. We loved it.Its very simple to do. Try this and let me know ladies !!

AVAL KESARI 1

INGREDIENTS

  • POHA / THICK AVAL - 1/2 cup
  • Sugar - 3/4 cup ( Add  1 tbsp less if u want mild sweet)
  • Water - 3/4 cup ( U can replace water with milk too )
  • Ghee - 2 -3 tbsp
  • Cardamom powder - 1/4 tsp
  • Cashews - A few
  • Orange -red food color / Kesari color - a pinch

METHOD

  • Heat a kadai with a tbsp of ghee and fry the cashews. Remove and set aside.
  • Now add the aval/poha in the same kadai and fry till it gets roasted with a nice aroma.U can add another tbsp of ghee while roasting.
  • Now soak the roasted poha in little water for 10 mins to make it soft. This enhances quick cooking. ( Add the water just to cover the poha)
  • Take the measured water in a bowl by adding food color.Allow it to boil
  • Now add the roasted poha and Cover cook for 10 mins stirring in between.
  • Once the poha gets cooked, add sugar and mix well.
  • Add a tbsp of ghee at this stage. Mix well.
  • Stir constantly for few minutes ( may be 10 - 12 mins).At one stage the kesari becomes non sticky and leaves the sides of the pan.
  • Add the roasted cashews and cardamom powder . Mix well and transfer to a bowl .

Serve hot !!

aval kesari

TIPS :

  • I wanted mine to be mushy .So i soaked poha for more time and added 1/4 cup more water while cooking .
  • Here I've mentioned the actual ratio given by my friend.So adjust the sugar & water ratio accordingly .
  • Add more ghee while u make for ur guests ;)


sábado, 18 de febrero de 2012

Alaska Diary Day Two

Alaska!
What a difference a day makes! I've never been as happy to see the sun as I was on day two of my Alaskan adventure. If it had stayed grey, I would have missed on some truly spectacular scenery.

XTRATUF
Even on sunny days, it's not a bad idea to wear the de rigueur Alaska footwear, Xtratuf boots.

salmon processor
In Cordova there are just three processing facilities (plus a 4th very small one) where the salmon is cleaned, cut and prepared to be shipped out. In the Summer kids from places like Slovenia, the Czech Republic and the Ukraine come to live and do the work American kids don't want to do. Even the roe is harvested and graded and prepared for export. Sport fisherman can bring their freshly caught fish in to be smoked or canned.

moose
You know you're in Alaska when a garage has a seaplane and moose hanging in it.

moose
Speaking of planes, I thought we would heading straight into grey, but that wasn't the case at all.

Sheridan glacier
A flight is the best way to see the varied terrain including mountains, marshes, inlets and glaciers.

Sheridan glacier
Especially the breathtakingly beautiful Sheridan glacier where locals go ice skating in the Winter.

Copper River
The next moment wilderness.

waterways
And a close up look at the waterways.

Cordova
The harbor, our hotel and town, all visible at once.

wild cranberries
On route to the airport, foraging for delectable wild cranberries just means pulling off the road.

car trouble
A drive through a deeper-than-expected puddle led to a stall and subsequent rescue from some locals who quickly got under the hood. Literally.

I was already a fan of Copper River salmon before this trip, but my appreciation for the people and the way of life in Alaska increased exponentially over the course of 48 hours there. Alaska gets under your skin. But if you can't come for a visit, enjoy Copper River wild salmon and know you are supporting a sustainable fishery and way of life for a special community of Alaskans who live in harmony with nature.

A huge thanks to Copper River/Prince William Sound Marketing Association for hosting me in Cordova. Please see Alaska Day One if you missed it...


MORE!
Post from Missy Trainer about our foraging for wild cranberries.